
Why Mini-Split Systems Are Perfect for Room Addition
Are you considering a room addition and wondering how to keep it comfortable year-round?
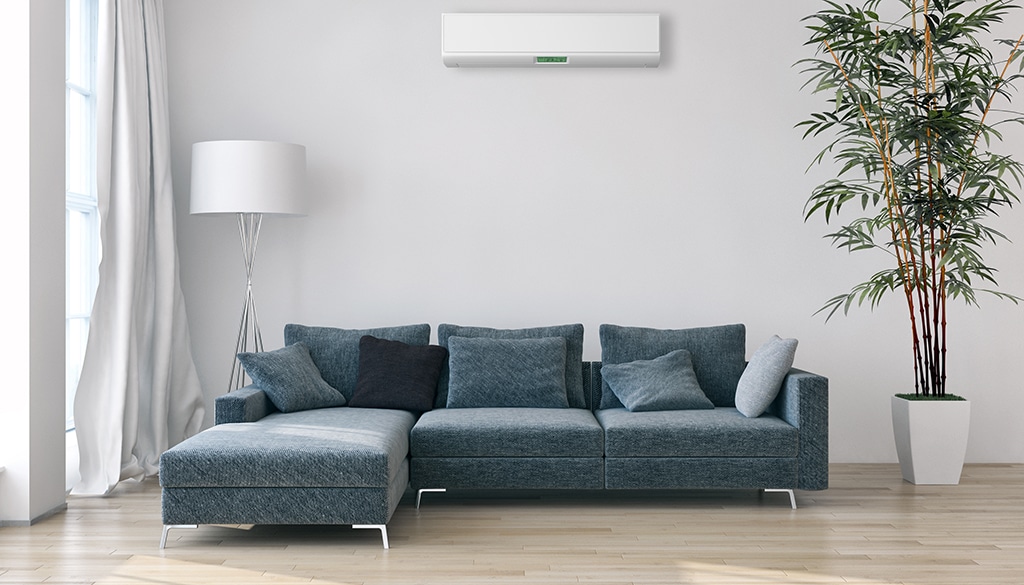
Mini-split systems might be the perfect solution for you. These versatile heating and cooling systems are gaining popularity for their efficiency and ease of installation, particularly in home additions.
Mini-split systems, also known as ductless mini-splits, consist of two main components: an outdoor compressor/condenser and an indoor air-handling unit. Unlike traditional HVAC systems that rely on ductwork, mini-splits deliver air directly to specific zones in your home, making them ideal for room additions where extending existing ductwork can be challenging and expensive.
Choosing the right mini-split system for your room addition is crucial. With various models and capacities available, it’s essential to consider factors such as room size, insulation, and your specific heating and cooling needs.

Benefits of Mini-Split Systems for Room Additions
When it comes to enhancing the comfort of your new room addition, mini-split systems offer numerous advantages. Here are some key benefits:
1. Energy Efficiency and Cost Savings
Mini-split systems are known for their energy efficiency, which can lead to significant cost savings. These systems operate on a zonal basis, meaning they heat or cool only the rooms in use, rather than the entire house. This targeted approach reduces energy consumption and can lower utility bills.
Additionally, mini-splits often have high SEER (Seasonal Energy Efficiency Ratio) ratings, indicating their superior efficiency compared to traditional HVAC systems.
2. Flexibility in Installation
One of the biggest advantages of mini-split systems is their installation flexibility. Because they don’t require ductwork, they can be installed in various locations, including spaces where traditional HVAC systems might not fit.
This makes them perfect for room additions, converted attics, basements, or any area without existing ducts. The compact design of indoor units allows for mounting on walls or ceilings, blending seamlessly with your room’s décor.
3. Improved Indoor Air Quality
Mini-split systems can enhance indoor air quality by using advanced filtration technology to remove dust, allergens, and other pollutants from the air. Traditional ducted systems can accumulate dust and mold, which then circulate throughout your home. With mini-splits, each room has its own unit, reducing the risk of contaminants spreading and providing cleaner, healthier air for your family.
4. Quiet Operation
Another benefit of mini-split systems is their quiet operation. The indoor units are designed to operate with minimal noise, creating a peaceful environment in your new room addition. This is particularly advantageous for bedrooms, home offices, or any space where tranquility is essential.
5. Easy Maintenance
Maintaining a mini-split system is relatively straightforward. The lack of ducts means less cleaning and fewer opportunities for dust and debris buildup. Regular maintenance tasks typically include cleaning the filters, checking the refrigerant levels, and ensuring the outdoor unit is free from obstructions. These simple steps can keep your system running efficiently and prolong its lifespan.
By opting for a mini-split system for your room addition, you can enjoy these benefits and more. Not only will you create a comfortable and efficient space, but you’ll also invest in a solution that supports long-term savings and improved air quality.
How Mini-Split Systems Work
Understanding how mini-split systems operate can help you appreciate their efficiency and suitability for room additions. Here’s a breakdown of their heating and cooling process and the key components involved.
1. Explanation of the Heating and Cooling Process
Mini-split systems work by transferring heat between the indoor and outdoor units using refrigerant. In cooling mode, the indoor unit absorbs heat from the room and transfers it to the outdoor unit, which then releases it outside.
Conversely, in heating mode, the system reverses this process: the outdoor unit extracts heat from the outside air and transfers it indoors, even in colder temperatures.
2. Key Components and Their Functions
Outdoor Unit: This unit houses the compressor and condenser. It is responsible for the heat exchange process. The compressor pumps refrigerant through the system, while the condenser releases or absorbs heat depending on the mode.
Indoor Unit: This unit contains the evaporator coil and a fan. It mounts inside the room and distributes the conditioned air. The evaporator coil absorbs or releases heat as the refrigerant circulates through it.
Refrigerant Lines: These insulated copper tubes connect the indoor and outdoor units. They carry the refrigerant between the two, facilitating the heat exchange process.
Control Unit: This includes the thermostat and remote control, allowing you to adjust the temperature and settings of the system. Many modern mini-splits also offer smart controls, enabling you to manage the system via a smartphone app.
Drain Line: This line removes the condensate (moisture) that is produced during the cooling process from the indoor unit.
By utilizing these components, mini-split systems effectively and efficiently heat and cool specific areas without extensive ductwork.
Mini-split systems’ efficient heat transfer process and streamlined design make them a perfect fit for room additions. Understanding how they work highlights their advantages over traditional HVAC systems, particularly in terms of energy savings and ease of installation.

Types of Mini-Split Systems
Selecting the right mini-split system involves understanding the different types available and their suitable applications. Here, we break down the primary types: single-zone and multi-zone systems.
1. Single-Zone Systems
Single-zone mini-split systems are designed to control the temperature in one specific area or room. These systems are ideal for:
Room Additions: Perfect for new spaces where extending existing ductwork is impractical or costly.
Garages and Workshops: Great for heating or cooling areas not connected to the main HVAC system.
Small Apartments or Studios: Ideal for single-room living spaces needing efficient temperature control.
A single-zone system consists of one outdoor unit connected to one indoor unit, making it straightforward to install and maintain.
2. Multi-Zone Systems
Multi-zone mini-split systems can control the temperature in multiple areas or rooms independently. These systems are suitable for:
Entire Homes: For homes without ductwork, multi-zone systems offer a ductless solution to provide heating and cooling throughout the house.
Multi-Room Additions: Ideal for larger additions that include several rooms, each requiring individual temperature control.
Office Buildings: Perfect for providing customized climate control in different office spaces.
A multi-zone system includes one outdoor unit connected to multiple indoor units, each installed in different rooms. This setup allows for precise temperature management in each zone, improving overall comfort and energy efficiency.
Suitable Applications for Each Type
Single-Zone Systems: Best for targeting specific areas. They are cost-effective and less complex, making them perfect for smaller projects and isolated rooms.
Multi-Zone Systems: Best for comprehensive climate control across multiple areas. These systems are more versatile and can accommodate various needs, making them suitable for larger homes and commercial spaces.
Choosing between single-zone and multi-zone systems depends on your specific needs and the layout of your space. For room additions, either type can be an excellent choice depending on the size and number of rooms involved.
By understanding the differences between single-zone and multi-zone systems, you can make an informed decision that ensures optimal comfort and efficiency for your room addition.
Factors to Consider When Choosing a Mini-Split System
Selecting the right mini-split system for your room addition involves several crucial considerations. Here are the key factors to keep in mind:
1. Room Size and Layout
The size and layout of the room play a significant role in determining the appropriate capacity of your mini-split system. An undersized unit will struggle to maintain the desired temperature, while an oversized unit can lead to inefficient operation and increased energy costs. Measure the square footage of the room and consider factors such as ceiling height, number of windows, and insulation quality.
2. Climate and Insulation
Your local climate and the level of insulation in your home affect the performance of a mini-split system. In areas with extreme temperatures, you’ll need a system with sufficient capacity to handle the heating and cooling demands.
Good insulation helps maintain indoor temperatures, improving the efficiency of the system. If you’re in a climate like Arlington, TX, where summers are hot and winters are mild, ensure your system is powerful enough to cool effectively while providing adequate heating during colder months.
3. Energy Efficiency Ratings
Energy efficiency is a critical factor when choosing a mini-split system. Look for systems with high SEER (Seasonal Energy Efficiency Ratio) and HSPF (Heating Seasonal Performance Factor) ratings. Higher ratings indicate better energy efficiency, which translates to lower utility bills and a smaller environmental footprint. Investing in an energy-efficient system can lead to significant long-term savings.
4. Noise Levels
Consider the noise levels of both the indoor and outdoor units. Mini-split systems are generally quieter than traditional HVAC systems, but there can still be variations between models. Check the decibel (dB) ratings provided by the manufacturer to ensure the system operates quietly enough for your comfort, especially if the unit will be installed in a bedroom or living area.
5. Aesthetics and Installation Flexibility
The appearance and installation flexibility of the indoor unit are also important. Mini-split systems offer various indoor unit designs, including wall-mounted, ceiling-mounted, and floor-standing options. Choose a design that complements your room’s aesthetics and can be installed in a location that maximizes efficiency while maintaining the room’s visual appeal.
6. Budget and Long-Term Costs
While the initial cost of a mini-split system is an important consideration, don’t forget to factor in the long-term costs. This includes energy consumption, maintenance expenses, and potential repairs. Investing in a high-quality, efficient system might have a higher upfront cost but can save you money in the long run.
Installation Process of Mini-Split Systems
Installing a mini-split system for your room addition can be straightforward, especially with proper planning and understanding of the steps involved. Here’s a detailed guide to help you through the process.
1. Step-by-Step Guide to Installation
- Choose the Location
Selecting the right location for both the indoor and outdoor units is crucial. The indoor unit should be placed where it can evenly distribute air throughout the room without obstructions. The outdoor unit needs to be in a well-ventilated area with enough space around it for air to circulate freely.
- Mount the Indoor Unit
Install the mounting bracket for the indoor unit on the wall or ceiling, ensuring it is level and securely attached to studs. Attach the indoor unit to the bracket and ensure it is firmly in place.
- Prepare the Hole for the Refrigerant Lines
Drill a hole through the wall near the indoor unit to run the refrigerant lines, drain line, and electrical wiring to the outdoor unit. The hole should be slightly sloped downward toward the outside to prevent water from entering.
- Connect the Refrigerant Lines and Electrical Wiring
Run the refrigerant lines, drain line, and electrical wiring through the hole and connect them to the indoor unit. Seal the hole to prevent air leaks and secure the lines with clips or brackets.
- Install the Outdoor Unit
Place the outdoor unit on a stable surface, such as a concrete pad or mounting brackets. Ensure it is level and has adequate clearance for proper airflow. Connect the refrigerant lines, drain line, and electrical wiring to the outdoor unit.
- Vacuum and Charge the System
Use a vacuum pump to remove any air and moisture from the refrigerant lines. Then, charge the system with the appropriate amount of refrigerant as specified by the manufacturer.
- Test the System
Once everything is connected and sealed, turn on the system and test its operation. Check for any leaks, unusual noises, or performance issues.
2. DIY vs. Professional HVAC Installation
While some homeowners might feel comfortable tackling the installation themselves, it’s often advisable to hire a professional. Here’s why:
Technical Expertise: Professional installers have the experience and knowledge to handle complex aspects of the installation, ensuring the system operates efficiently and safely.
Proper Sizing and Placement: Professionals can accurately assess your room addition’s requirements, ensuring the system is properly sized and installed in optimal locations.
Warranty Protection: Many manufacturers require professional installation to validate the warranty. DIY installation might void the warranty, leading to potential issues down the line.
Safety Considerations: Working with refrigerant and electrical components can be hazardous without proper training and tools. Professionals adhere to safety protocols to prevent accidents and damage.
3. Cost Considerations
The cost of installing a mini-split system varies depending on several factors, including the complexity of the installation, the type and number of units, and local labor rates. While professional installation may involve a higher upfront cost, it ensures the job is done correctly and efficiently, potentially saving you money on future repairs and maintenance.
Energy Efficiency of Mini-Split Systems
Energy efficiency is one of the standout features of mini-split systems, making them an excellent choice for room additions. Here’s a deeper look into their efficiency ratings and tips for maximizing their performance.
1. SEER Ratings and What They Mean
SEER (Seasonal Energy Efficiency Ratio) is a measure of how efficiently a cooling system operates over an entire cooling season. The higher the SEER rating, the more energy-efficient the system is. Mini-split systems typically have SEER ratings ranging from 16 to 30, which are significantly higher than those of traditional HVAC systems, which usually range from 13 to 18.
HSPF (Heating Seasonal Performance Factor) is the heating efficiency rating for heat pumps. Similar to SEER, a higher HSPF rating indicates better energy efficiency. Mini-split systems often have HSPF ratings between 8 and 12.
These high-efficiency ratings mean that mini-split systems consume less energy to provide the same level of heating or cooling compared to traditional systems, leading to lower utility bills and reduced environmental impact.
2. Tips for Maximizing Efficiency
- Proper Sizing
Ensure the mini-split system is correctly sized for your room addition. An oversized unit will cycle on and off frequently, reducing efficiency, while an undersized unit will struggle to maintain the desired temperature.
- Regular Maintenance
Perform regular maintenance to keep your system running efficiently. This includes cleaning or replacing air filters, checking refrigerant levels, and ensuring the outdoor unit is free from obstructions like leaves and debris. Routine maintenance helps maintain optimal performance and extends the lifespan of the system.
- Utilize Programmable Thermostats
Many mini-split systems come with programmable or smart thermostats that allow you to set specific temperatures for different times of the day. Using these features can help you save energy by reducing heating or cooling when the room is not in use.
- Insulate Your Room Addition
Proper insulation is crucial for maximizing the efficiency of your mini-split system. Good insulation helps maintain the desired temperature with less effort, reducing the workload on your system and saving energy.
- Use Ceiling Fans
Ceiling fans can help distribute air more evenly throughout the room, allowing you to set your mini-split system to a higher temperature in summer or a lower temperature in winter, thereby saving energy.

Frequently Asked Questions
- What is a mini-split system?
A mini-split system, also known as a ductless system, is a heating and cooling solution that consists of an outdoor compressor/condenser and one or more indoor air-handling units. It provides efficient temperature control without the need for ductwork.
- How long do mini-split systems last?
Mini-split systems typically last between 12 to 15 years with proper maintenance. Regular cleaning, timely filter changes, and annual professional check-ups can extend their lifespan.
- Are mini-split systems noisy?
No, mini-split systems are designed for quiet operation. Indoor units typically produce noise levels between 19 to 30 decibels, which is quieter than a typical conversation.
- Can mini-split systems heat and cool multiple rooms?
Yes, multi-zone mini-split systems can heat and cool multiple rooms independently. Each room or zone has its own indoor unit, allowing for customized temperature control in different areas of the home.
- How does the climate in Arlington, TX affect mini-split system performance?
The hot summers and mild winters in Arlington, TX, are well-suited for mini-split systems. These systems provide efficient cooling during hot weather and reliable heating during cooler periods, ensuring year-round comfort.
Do you have any experiences with mini-split systems, or are you considering one for your room addition? Share your thoughts and questions in the comments below!
